Today we discuss how to use ImageMagick to add a frame and label to an image without obscuring any detail.
Most the image descriptions seen on web sites are written in HTML and are lost when the images are downloaded by a visitor.
You can add descriptions to the metadata stored in an image but some sites remove the metadata when the image is uploaded to reduce the file size. Even when the metadata remains intact many users don’t know how to access it.
Using a frame and description helps solve those issues.
Here is the original image.
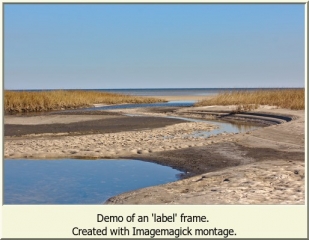
Here is the image after adding the label frame.
The resulting image reminds me of some of the old Polaroid photographs that had a wide border on the bottom where you could write notes.
Here is the code used to generate label frame:
montage  -label "Demo of an 'label' frame. \n Created with Imagemagick montage. "  \

demo-image.tif  -frame '7x7' -mattecolor 'beige'  \

-font 'Tahoma-Regular'  -pointsize 17 -geometry '+0+0' label-frame.tif
This command was issued in a Linux bash shell. It takes the input file ‘demo-image.tif and outputs the file ‘label-frame.tif”
The backslash at the end of line causes the next line to be appended so the result is a single line command. The \n in the label text starts a new line in the resulting image label. Spaces around the \n are added to make the code more readable and are not necessary for the code to work.
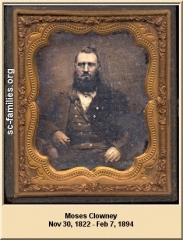
I use this technique frequently on my sc-families.org genealogy website to add information about my ancestors to their image.
Here is an example from that site (click to enlarge).
The montage command was originally used to create a photo montage but can be used for many other purposes.
Much more information on the montage command can be found here.
I hope you found this information helpful.
Thanks for visiting this site!
Jim


