My first attempt at infrared photography took place at St. Marks National Wildlife Refuge for a very simple reason: the sweeping landscape, clouds, and ocean could help make any photo look good.
Most modern digital cameras can record infrared. To find out if yours does simply point your IR remote control toward the lens of your camera then either take a photo or watch “live view” while while pressing some of the remote buttons. If you see light from the remote then you camera will work, at least to some degree.
Getting setup for IR photography can be as simple as buying an infrared filter for your lens. There are a number of filters available but I got the Hoya R-72 which is probably the best for beginners.
The R-72 does not filter out all visible light and some of the visible wavelength red, blues, and greens are recorded which allows for some subtle color in the final image.
I went to the refuge on a weekday so there would be fewer visitors but as I was setting up to take a photo of the lighthouse a few tourists showed up to pose for photos. I didn’t want people in my shot but decide to take a few test exposures until they left. At ISO 400 it required a 6 second exposure to get the image which I knew would cause some blurring of the plant leaves due to the sea breeze .
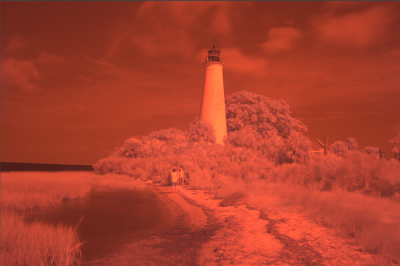
To my surprise one of the first photos I shot turned out to be the best of the entire day although it looked awful when I reviewed it in the LCD display
Later at home I opened the image in my raw developer “Darktable” and it was not very attractive.
(click to enlarge)
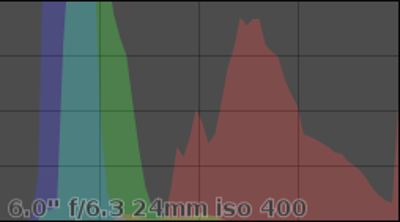
The raw histogram looked like this:
Notice the blues and greens appear only in the darker part of the histogram which is dominated by the IR and visible red light.
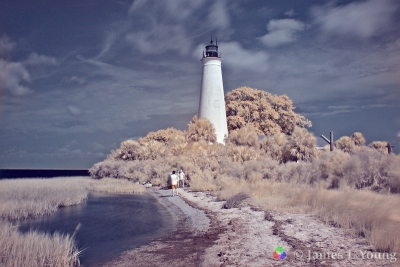
From my research I knew the first step to create “color” photo from infrared is to swap the red and blue channels so the skies and water have a more realistic appearance. Red skies and water is not desirable unless you are trying to create an alien landscape :-).
Darktable has a input color profile called “linear infrared BGR” which will swap the blue/red channels automatically and Gimp has a similar feature “Filter/Eg/infrared Channelswitch”
After applying the Infrared profile, tweeking the tone curves, and boosting the color saturation I got this much more interesting image:
(click to enlarge)
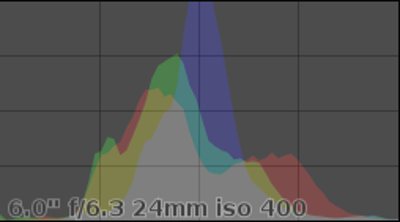
This is the histogram after the adjustments.
Please note I did not do any color painting or other approach to artificially add colors not already in the image.
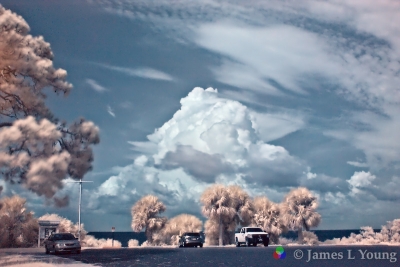
Here is another image from the lighthouse parking lot showing a thunderhead forming in the background. If you look carefully you can see red is showing in the stop sign.
(click to enlarge)
In some ways infrared images, especially those converted to B&W, are reminiscent of the work of Ansel Adams. Adams use red filters to darken the sky and yellow filters to lighten aspen leaves.
With IR photography you get the dark sky and light foliage using only one filter.
Back in my early years of photography in the late ’60s and ’70s when I did mostly B&W I found the red, yellow, and polarizing filter really helped bring out the sky and foliage and used them regularly.
There are some purists who think any manipulation of an image is wrong. I think it is wrong to add visual elements like clouds or the moon unless you label the image as a modified work. If someone like Ansel Adams manipulated his images to get the best look there is no reason average photographers shouldn’t do the same.
Remember: All modern digital cameras capture images in RAW mode without any adjustments. The JPEG image that digital cameras produce has been heavily altered by the software created by programmers working for the camera company.
Do you want to leave it to someone else to “develop” your photo or do you want to do it yourself and get the image you envision? For my favorite photographs I want to take control of the process to get the look I want.
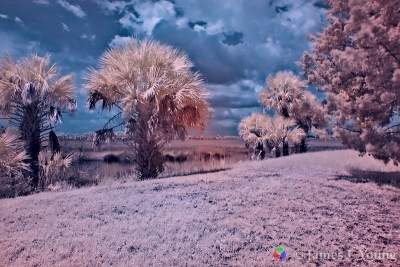
Here one last image I shot on a levy trail that came out with a very surrealistic look.
(click to enlarge)
Do you see the lighter spot near the center of the image? That is IR lens flare and my stock lens has that problem when I set it to the 18mm wide angle.
I found with my old Canon XSi camera that the autofocus worked correctly in wide angle shots and the autoexposure was close but but needed to be opened up about a stop for the best exposure.
In conclusion I think IR photography is worth perusing and I will do more of it, although mostly I will continue to do conventional photography.
Jim

