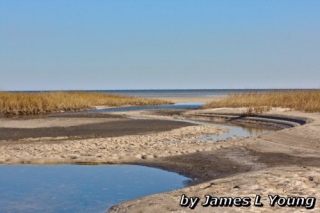
Annotating your images with with text or images is a very common part of photo workflow and is often the last step before publishing.
Most workflow programs like darktable and album creation applications such as jalbum will allow you to automatically add logos, titles, and copyright notices to your images.
As good as these applications are they often have some limits on how much control you have over the process.
If you want near total control over the process and don’t want to custom edit every image in your photo editing application then command line tools are your best option
The best command line tool I have come across is ImageMagick .
Imagemagick is actually a suite of programs that can create and modify your images. The imagemagick site has a lot of documentation and examples. Most of the code samples I have on this site are simply modified version of their examples.
One of the programs in imagemagick is called “convert” and can quickly and easily perform a lot of tasks.
Typing “convert demo.tif out.jpg” will convert demo.tif into a jpg file called out.jpg. “convert” will automatically do conversions based on the extension of the output file name.
You can also convert and resize a file by typing “convert demo.tif -resize 400x out.jpg“. In this case the output file will be 400 pixels wide. You can also specify both width and height by typing “convert demo.tif -resize 400x200 out.jpg”
Convert is quite conservative and will not distort or crop your image. If it can’t convert the size without distortion it will make the image fit one of the two dimensions you gave.
Let’s move on and look at an actual example of adding a watermark to an image
For all the following examples I am using the image “demo.tif” which is 1200 pixels wide.
When applying annotations to multipe images it is handy to have all the images the same size so you can use the same pointsize for all of them. The images can be resized at the last step of the process.
The following command will apply my watermark to the bottom right side of demo.tif. The font is Palatino-bold, pointsize 50, and the font color is white. The back slash at the end of the line is a continuation character which joins the next line to the current line. Remember these examples are all one line.
convert demo.tif -fill white -font Palatino-Bold -pointsize 50 \

 -gravity southeast -draw "text 0,0'by James L Young' " \

 -resize 500x simple-watermark.jpg
This looks pretty good, but we can see a bit of the text was cut off at the bottom and right side of the image. To fix this we need to move the text up and to the left.
To do that we need to alter the line that reads:
-gravity southeast -draw "text 0,0'by James L Young' "
This line sets the gravity (location on the image) to the southeast part of the image, then does a draw operation specifying this is text with an X,Y offset of 0,0 (no offset) and the text is ‘by James L Young’.
To reposition our watermark the we can shift the image moving away from the southeast by 10 pixels from the bottom and 10 pixels from the right.
convert demo.tif -fill white -font Palatino-Bold -pointsize 50 \

 -gravity southeast -draw "text 10,10'by James L Young' " \

 -resize 500x simple-watermark2.jpg
That change worked and we have a good simple watermark.
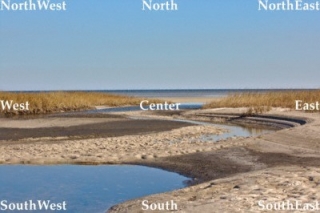
Before we look at more complex watermarks let’s take a more detailed look at the -gravity positions by drawing text in each of the regions.
convert demo.tif -fill white -font Palatino-Bold -pointsize 50 \

 -gravity center -draw "text 0,0'Center' " \

 -gravity north -draw "text 0,0'North' " \

 -gravity south -draw "text 0,0'South'" \

 -gravity east -draw "text 0,0'East' " \

 -gravity west -draw "text 0,0'West' " \

 -gravity northeast -draw "text 0,0'NorthEast' " \

 -gravity northwest -draw "text 0,0'NorthWest' " \

 -gravity southeast -draw "text 0,0'SouthEast' " \

 -gravity southwest -draw "text 0,0'SouthWest'" \

 -resize 400x gravity.jpg
As we examine the output we notice the east and west regions are printed out horizontally.
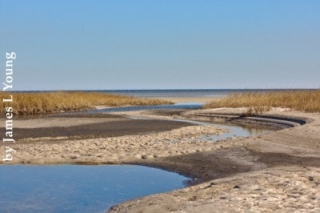
What if we want to put our watermark of the west side but have it printed vertically?
One way to do that is to rotate the image 90 degrees so the left (west) side of the image is on the top, the do our draw operation with a -gravity of north. After drawing the text we rotate the image -90 degrees to get it back to the normal upright position. We will also move the text away from the left side of the image by 10 pixels.
convert demo.tif -fill white -font Palatino-Bold -pointsize 50 \

 -rotate 90 \

 -gravity north -draw "text 0,10'by James L Young' " \

 -rotate -90 \

 -resize 400x vertical-label.jpg
If you are observant you may wonder why I specified the offset 0,10 in the Y axis instead of the X axis to move the final text away from the left side of the image. The reason is that the text was drawn when the image was rotated 90 degrees, so we were moving it away from the top of the image.
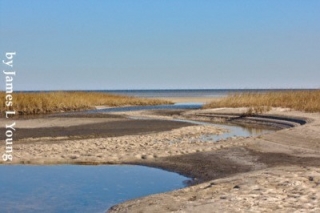
If you wanted the watermark to appear with the bottom edge of the text against the left side of the image you can rotate the image -90 degrees and write with -gravity set to south.
convert demo.tif -fill white -font Palatino-Bold -pointsize 50 \

 -rotate -90 \

 -gravity south -draw "text 0,10'by James L Young' " \

 -rotate 90 \

 -resize 400x vertical-label2.jpg
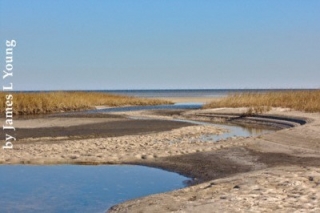
Another to use rotated text is to specify the rotation in the draw command.
convert demo.tif -fill white -font Palatino-Bold -pointsize 50 \

 -gravity west -draw "rotate -90 text -160,35'by James L Young' " \

 -resize 400x vertical-label3.jpg
Directly rotating the text in the draw command requires more tweaking of the offsets so using the whole image rotation is a bit simpler.
To conclude this post I will end with modified script I got from the imagemagick site. This is a somewhat more complex watermark.
convert demo.tif -font Verdana-Bold-Italic -pointsize 50 \

 -stroke black -strokewidth 3 \

 -fill black -gravity southeast -draw "text 15,15 'by James L Young'" \

 -fill white -draw "text 20,20 'by James L Young'" \

 -resize 500x fancy-signature.jpg
This script draws two versions of the text, one in black and one in white slightly offset to create a shadow effect. It also “strokes” the text giving it a black outline
In my next post I will show how to watermark one image with another image. This technique is very versatile and is how I watermark my images.
Thanks for visiting!
Jim


