In my last post I discussed annotating images with text using imagemagick.
This time I will show how to annotate an photographic image with a bitmap image which acts as a watermark. The watermark can contain text, corporate logos or even other photos.
In these examples I will use imagemagick to create and embed the watermark but you could create your own image using GIMP or other editing software.
The code examples I use in this post are modified versions of examples from the imagemagick.org site.
Since I use a Linux computer the examples are written as a Bash shell script. The script can easily be converted to a Windows batch file.
Creating the watermark
Our goal is to create a watermark measuring 340×85 with a transparent background for use with source images that are 1200 pixels wide.
I like to have a watermark that is visible, but not intrusive. A good way to accomplish this is to use a semi-transparent watermark that blends into the photograph.
Problems arise when the background is the same color as your watermark, for example a white watermark on a white background. A simple way to get around this is to add a dark shadow to a light colored watermark so that it will stand out.
To create our shadow we will draw our watermark ‘© James L Young’ with a strong Gaussian blur.
We then move to a slightly different location and draw our watermark a second time without the blur.
The text is filled with white and outlined (“stroked”) with 60% grey to help it stand out from the background.
The resulting image is saved as “logo.png”. The PNG format is an ideal format for watermarks since it supports transparency.
Here is the actual code:
TEXT="© James L Young"

convert -size 340x85 xc:transparent -font Palatino-Bold -pointsize 40 \

-draw "text 25,60 \"$TEXT\"" -channel RGBA -gaussian 0x7 -fill white -stroke grey60 \

-draw "text 20,60 \"$TEXT\"" logo.png
Here is our watermark
The shadow around the text helps it stand out, but what if you are using a logo or text without a shadow?
According to the imagemagick site, another solution called “Greyed Dissolve” is to adjust the watermark so there are no pure blacks or pure whites by “greying” the image a bit so that the blacks are a bit lighter and the whites are slightly darker.
The “Greyed Dissolve” technique is applied when we add the watermark to our photo.
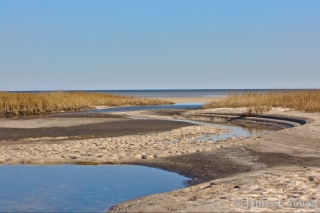
Now let’s put all these steps together and add our watermark to the bottom right side (southeast) of our demo.tif file.
convert logo.png -fill grey50 -colorize 40% miff:- |\

composite -dissolve 70 -gravity southeast - demo.tif demo-with-logo-se.tif

#Now resize the image and convert it to a jpg.

convert -resize 700x demo-with-logo-se.tif demo-with-logo-se.jpg
Click image to enlarge.
Explanations:
miff is a special imagemagick file format optimized for streaming an image via a pipe to another command
The | is a pipe symbol in Unix/Linux that passes the output of one command to another command without having to create an intermediate file.
In this example the “convert” command applies the “”Greyed Dissolve” and passes the image via the pipe to the “composite” command that dissolves the logo into the image.
The “Greyed Dissolve” is accomplished with the parameters “-fill grey50 -colorize 40%”
The value after the “-dissolve” is the amount 0-100 (100 = don’t dissolve the logo at all)
The last three options on the “composite” line are :
- The the name of the file to merge (in this case a “-” is used to represent the miff data sent via a pipe)
- the file to merge with (demo.tif)
- The output file (demo-with-logo-se.tif)
The last step resizes the image and converts it to a jpg.
In this first example the watermark seems rather faint because it is placed on the lighter sandy area of the image.
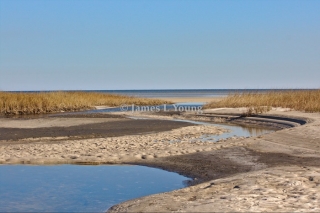
Let’s put it in the center to see how it looks against a different background.
convert logo.png -fill grey50 -colorize 40% miff:- |\

composite -dissolve 70 -gravity center - demo.tif demo-with-logo-center.tif

convert -resize 700x demo-with-logo-center.tif demo-with-logo-center.jpg
Click image to enlarge.
For my purposes I find this a good watermark. It is a bit faint on light colored backgrounds but nicely visible on other backgrounds.
If want a bolder watermark, you can tweak the values to fit your needs.
At the end of this series of posts I will show my code for processing large numbers of files with the ability to customize your watermarking for each image.
Tiled Watermark:
I want to discuss another way of watermarking images with many faint logos covering the image. This is particularly useful if want to make it very difficult for some one to crop out your watermark or overwrite it with their own watermark.
I see this technique often used with on-line store product images.
A good way to do this is to create a new watermark with your logo shown twice and then tile the watermark across your image.
convert -size 350x100 xc:transparent -fill grey -font Palatino-Bold -pointsize 20 \

-gravity northwest -draw "text 10,10 '© James L Young' " \

-gravity southeast -draw "text 15,15 '© James L Young' " tiled-logo.png
Now we add that watermark to our demo.tif file using the -tile option.
convert tiled-logo.png -fill grey50 -colorize 40 miff:- |\

composite -dissolve 70 -tile - demo.tif demo-tiled.tif

convert -resize 700x demo-tiled.tif demo-tiled.jpg
Click image to enlarge.
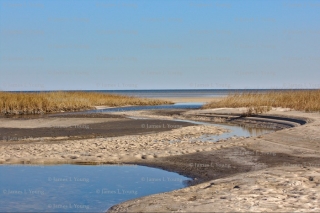
At this resolution the text is quite small, but is readable.
This version of watermarking has the advantage of being much more difficult to remove (or cover up) than the single watermark, but I think it is a bit intrusive if you are trying to show off your best photos.
On the other hand, if you are selling your photographs it would certainly encourage people to buy your non-watermark version.
This concludes the “annotation” section of the blog but I have many more workflow posts planned. Check back often.
I hope you found this post helpful.
Thanks for visiting!
Jim


